
I decided that I needed something that I would be excited to carry...so I went digging through my fabric stash determined to find what I needed without spending any money on it. I came close to accomplishing that! I stumbled across the Wonder Woman print at Walmart in the fat quarters bin for $1.47. I was planning on covering it with Super Mario, but that made 2nd place and became the inside print. I decided a little iron-on vinyl would keep it clean and durable longer and some stiffener would help give it shape and stability. All in all I spent about $4 on those 3 pieces. I couldn't resist embroidering the envelope designations just to really make it my own. You can really tell that I was born in the late 70's by the eclectic combo of 60/70's movies & tv shows, 80's and 90's cartoons, and the overall vibe of it. I get compliments on it everywhere I pull it out to make payment! So often, that I am actually working out a few technique issues and will likely be listing them in my Etsy shop!
In a future post, I'll be doing a step by step of how I do the envelopes. But for this post, I'm just dropping a teaser!
The outer layer is covered with iron-on glossy vinyl. With as much love this wallet will get, I definitely wanted to boost the durability for the long haul.

I added a little pocket kinda last minute. I stash any receipts in there until I'm ready to toss them.

Each category represents what we use the most. Other purchases (like my car inspection) are coming out of the "misc expenses" envelope as needed.


I threw in a blank one because I knew something would come up that I'd wish I had an extra. For now, I use it for the worn out envelopes with the kids' cash in it. I plan to make them a legit envelope at some point.
And of course, I needed a coin pocket so I can make exact change when possible. I used snaps in this one since it pretty much gets folded up snug enough that the coins won't fall out. I didn't have Velcro handy and didn't want to make a special trip or spend the money on that. I made due with some coordinating snaps I already had from some other past projects.

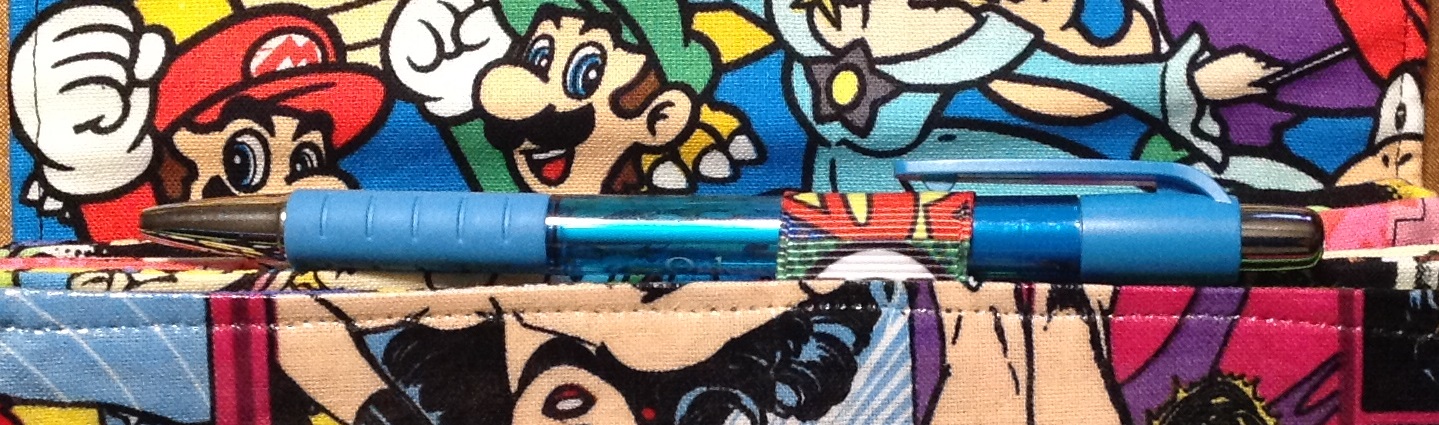
Just before closing up the final opening, I added a loop of ribbon for a pen. I'm glad I did! It has already come in handy to make notes on receipts or document something I needed to deduct from the budgeting app we use. Even with cash, I keep account of where it all goes. It's so easy to see where our money goes, and it's freeeee!
A couple of gals at work ooh'd and ahhh'd and not-quite-sublty told me that I needed to make another for them to buy. It just so happed that one of their birthdays is so close, and I can't justify spending the money on a little something (like I had been doing for the other recent birthdays). I added a few features to hers that I didn't think of the first time around. After I'd finished up the wallet I made for my coworker, I decided that I couldn't live with out one of the bonus features! You'll see all of that in a later post (her birthday is next week, so hang tight!) and it just seems like it is gonna be so dang handy. I made sure to go ahead and take tons of pictures, partially for the future post and partially for me to kind of create a catalog of sorts of options.
I really hope you enjoyed the breakdown of the design. Depending on demand, I can do a step by step of how I made each add-on. This was loosely based on this great tutorial that I found on Pintrest. I modified the sizing a good bit, and then even more when I made the second wallet. If you need measurements, just drop a comment. I've decided that anymore wallets I make will have a wider wallet part. It was really hard to sew it up with the bulk of the envelopes. That may have been because I added the stabilizer in each envelope. I'll find out when I make the next one.
Happy NEW YEAR!!